I’ve been having trouble making the points of my turnouts fit snugly. Wheels tend to pick the points and cars derail. It’s especially hard with the Proto:87 wheels since they have such a narrower and shallower flange. I’m using the points from Proto87 Stores, but am not having much luck getting them to work.
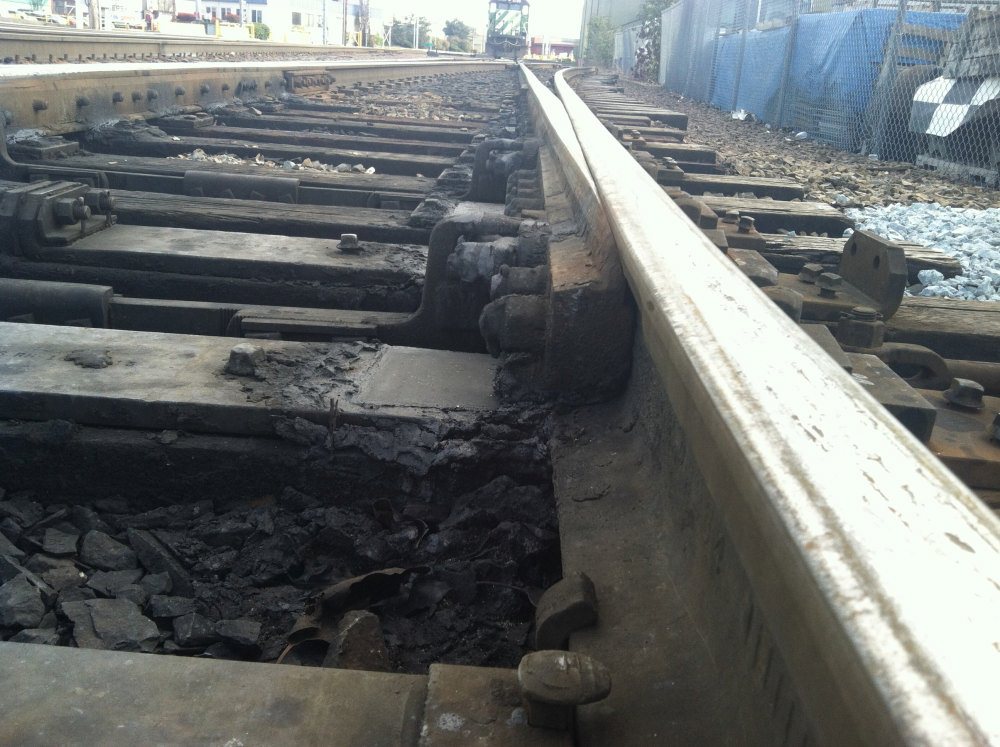
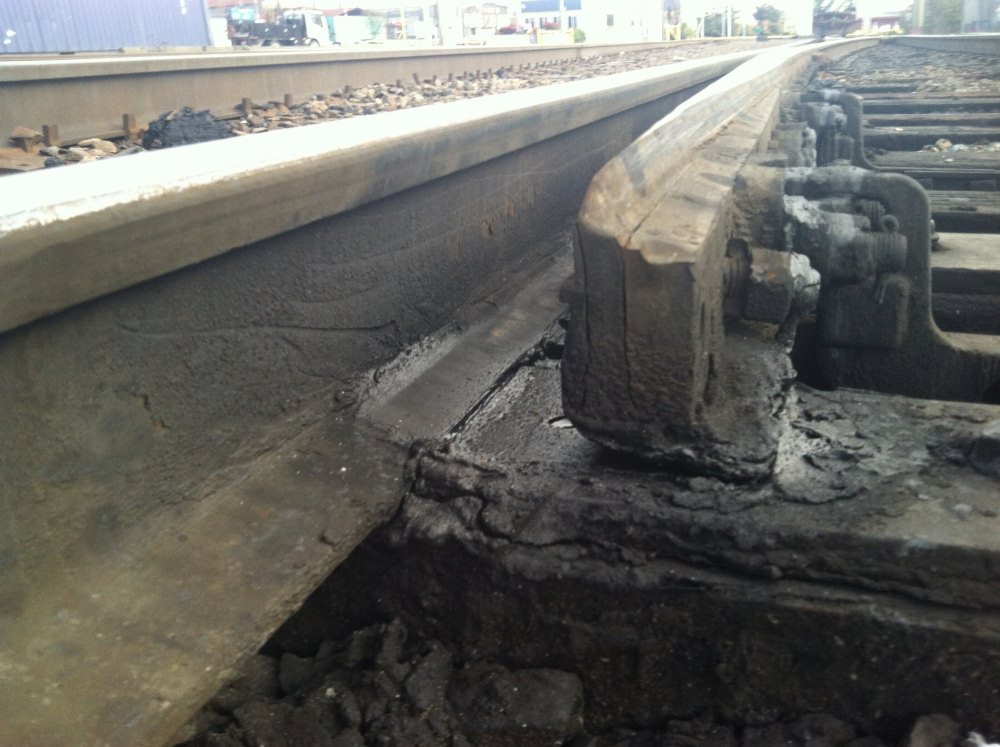
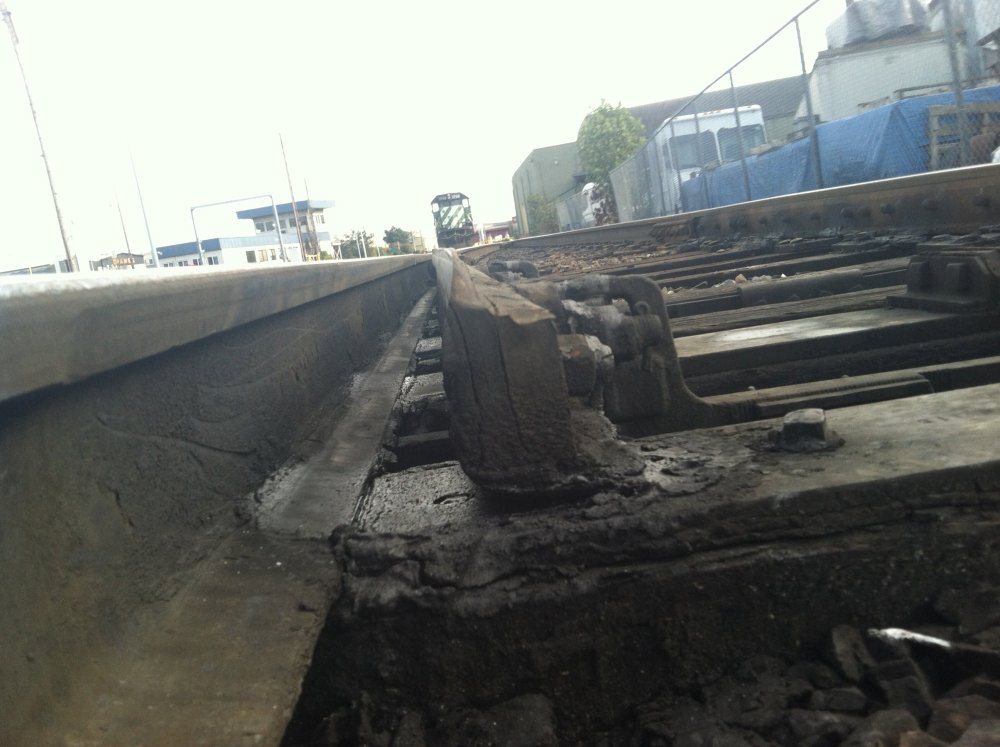
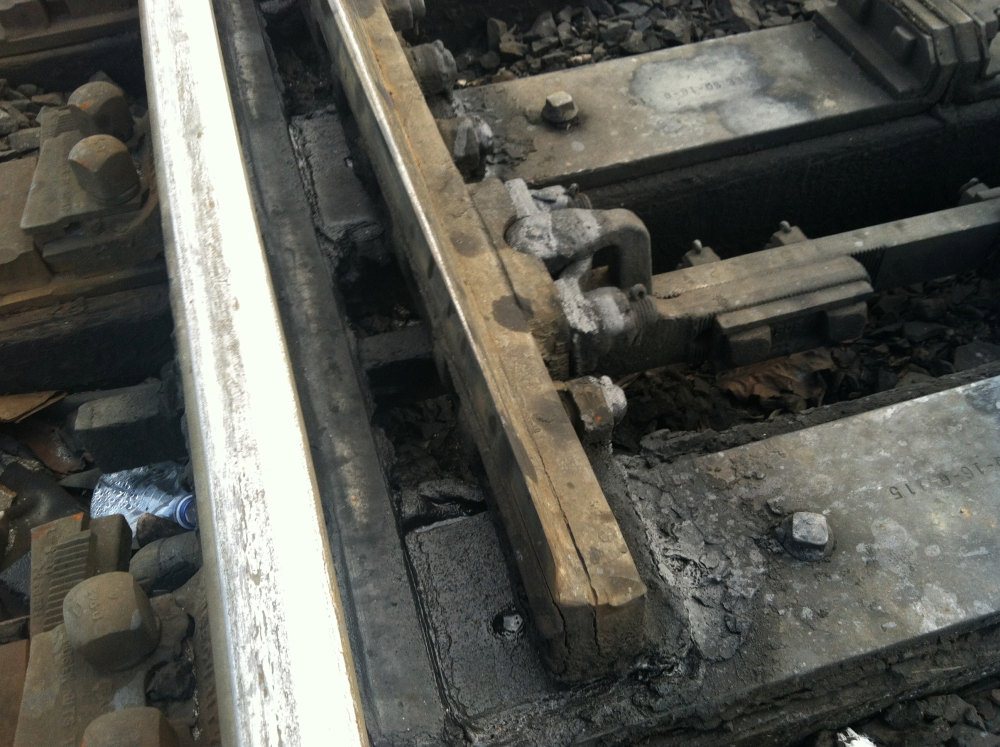
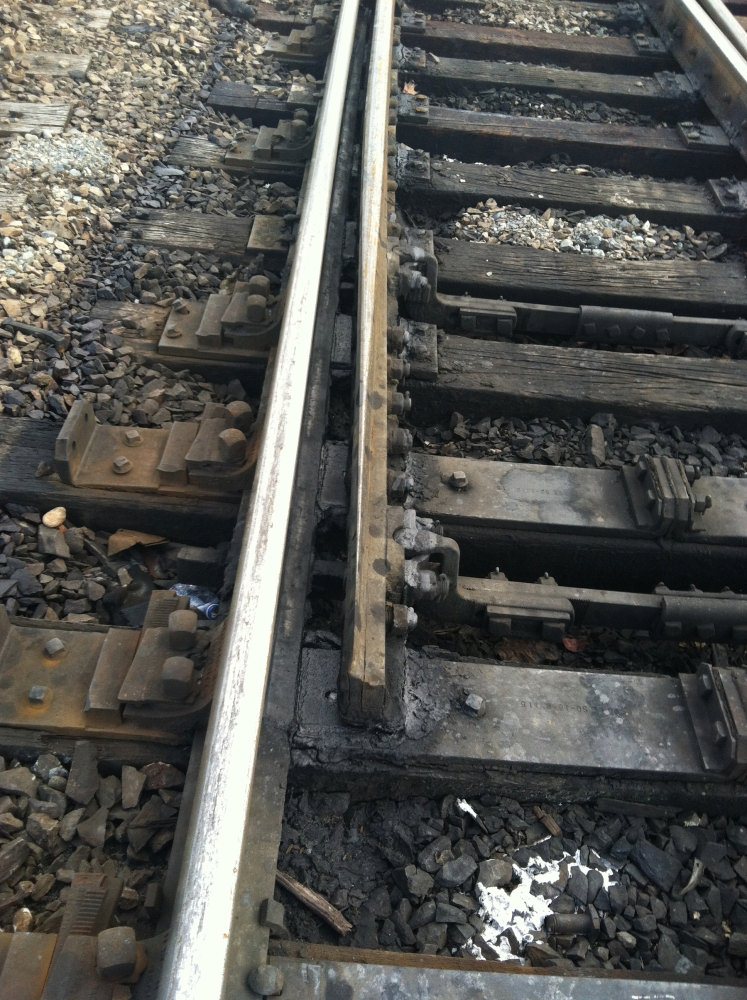
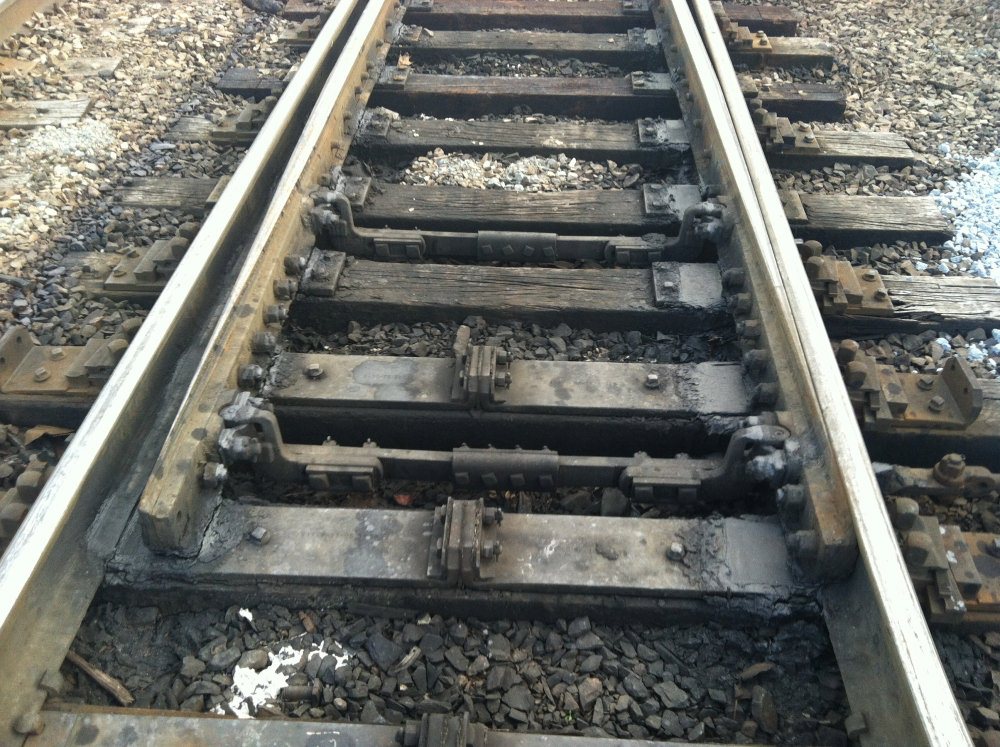
I took some pictures to study the profile of prototype points. It’s surprising how blunt the ends really are.
I’ve decided to try filing my own points. I followed some advice from a thread on the Model Railroad Hobbyist forum. I’m basically filing along three planes and adding a brass bar to the front for support. The result is a better fitting point. The first pair is kind of ugly, but I’ll probably be able to make more refined points as I practice.
1,423
HI Greg,
I have really enjoyed reading your posts on this site.
I have ambitions (but no time yet) to build a few of the Proto87 Stores HO ultimate turnouts.
Things I’m grappling with:
– I guess it is more proto-typical to have points that hinge at the closure rail (as with the Proto87 ultimates) vs. one continuous closure/point rail (as in FastT approach). However, that puts a gap in the rails where I would just as soon not have any gap. The separate point potentially has some freedom to move even slightly, possibly leading to derailments, or at least not as smooth. I honestly can’t see any gaps in the proto-type point-to-closure rail from photos on-line that I’ve looked at. Point being, if the joint is there, it doesn’t appear to be very pronounced. So why bother on the model.
-I love the look of the tie plates. Fastening down all those tie plates has got to be a lot of work. I keep rolling this around in my mind – how to speed that process up. Some sort of rolling applicator that you roll along the ties, that deposits a blob of glue then deposits a tie plate, all at the correct position. No clue how one could build such a thing…
I watched a you tube video of someone mounting the tie plates using the positioning jig. It almost appeared the jig is in the way as far as getting the plates fastened down. One idea I had – place the tie plate jig on the ties, then while holding it in tight contact with the tops of the ties, hit it with some spray paint, just enough to to create an image on top of the ties where each plate should go. Then remove the positioning jig and just mount the plates on top of each imaged spot (use some fast-drying paint…). What do you think, is this even viable?
-The hinge between closure and point rail is a thin flat plate. It doesn’t look like it holds the point rail solidly – could allow the point rail to move/tilt a bit? I noticed on Proto87’s web site, there are also rail-flanges that could be used instead. (It wasn’t easy to find when I went back a few days later to take another look). It looks like it may offer a more stable point arrangement than the hinge plates, and it looks great. The rail flange is glued onto the side of the point and closure rail web (the vertical part below the top of rail). But until I purchase a few kits and try all this out, I can only speculate.
-The throw bar is another problem area as I see it. I’ve read on numerous forums that soldering the points to pc-board throwbars (at least with the continuous closure/point setup) can lead to failure in the solder connections – the stress causes the point to break away over time. Maybe with separate points this isn’t as much of an issue since the point rails have a pivot/hinge at the other end.
I like the looks of the Proto87 throwbar setup. I also saw on Proto87 site there is another way to do this. There is a small, 3 hole flage, that is glued to the front end of the point rail, about where the pre-drilled hole is. This plate lies flat, so that any one of the 3 holes provide an attachment point for a separate wire to attache into. The other end of the wire is glued to the throw-bar. Again, this isn’t well publicized on the Proto87 site but it is there and I think it may be a lot better than the hooked plate that has to go into the pre-drilled hole. I thought it also looked great.
Let me know if you would like the link to that page, there wasn’t a direct link to it. I would be interested if you have any knowledge with this approach.
Any thoughts you may have on any of this appreciated.
One thing that I have noticed on a few sights I have come across where folks working with these Proto87 kits have posted videos or photos of the construction, the joints between the closure rail and point rail often have gaps that I would consider kind of too big. I would be inclined to carefully file the end of the closure rail so that the top (of rail) is slightly longer than the bottom (angled in the vertical plane so that the top of rail comes a bit closer to the point rail than the hinge plate would otherwise allow), to close that gap up a bit. The hinge plate has a built-in separation between the two rails (closure to point) just by its design. So what I’m proposing is to slightly bevel the rail-ends so the tops sort of reach out a bit past the little flange in the hinge plate that creates the gap. Also, I’m thinking its important to make sure the rail ends are smooth, with flat faces, no burrs, etc. Bottom line, this separate point rail really adds a lot of work, with potential to make problems later, in my opinion.
Would like to know what you think since you have a fair amount of experience here that I do not have.
Re. your photos of the proto-type turnout, you made a comment about how blunt the end of the points are. Looking closely at your wonderful photos, I can see that the head-end (lead end) of the point dips down a bit. There is a sort of blade-like flange that rises above the body of the point, right along the edge that meets the corresponding stock rail. So it looks like as the wheel enters the point, that blade-like flange sort of rises up (sneaks up) between the wheel flange and the stock rail as the wheel progresses along the point. I haven’t seen the Proto87 stores points up close yet. Is this anything like how they look/operate?
Again, thank you for sharing your experiences on this project you have going. Really cool and I’ve learned quite a few things.
Best Regards.
#10 Left PDF
http://www.proto87.com/media/template_p87_10_l.pdf
Aha! I figured out what I was doing wrong with the Proto87 Stores points. I was making them too long. I was trying to position the predrilled hole inside the headblock ties, it is supposed to be two ties back. The result was I was extending my points beyond where they were supposed to be, which caused me to fiddle and file with them which caused derailments. I’m reinstalled the last remaing semi-operable pre-made Proto87 points I had available and it works just right. I’m in the process of making another turnout, lets see if my hypothesis is correct.
Greg, It helps that you are on the inside to get great pics from work. Have you checked the gauge at the points? That is a tough one with out seeing it up close.